Wood 3
Part 3 in a series of stories about our farm, the firewood production project and our involvement with Oregon Woodland Coop.
The first story of the series, looked at history, growing conditions and what kind of wood that is available with our farm/forest protocol. The second story got into the volume of wood, the manner of storage and how much space is needed for the process. Story three will examine our steps of how to get from log to firewood.
Story 3- From tree to firewood

We begin in the woods. Unlike clear-cuts that make huge gaps in the landscape, we selectively thin out trees that are too thick, sick, dying or are broken to let the rest of the trees grow to their potential. Our stand of timber does not decrease in mass board feet each year from this process and in some years, where we do not do much logging, actually increases in volume. We are also planting new seedlings each year with the expectation of 50 to 100 years from now having the forest land can continue with our set protocol.

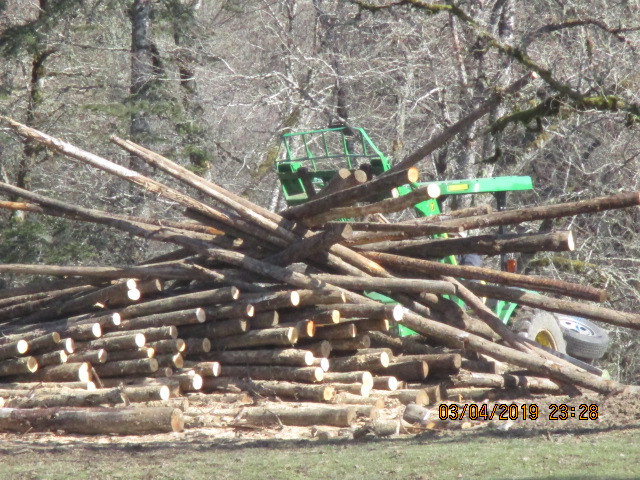
Trees with limbs removed are hauled down the hill to the landing at the base of the hill. The log deck can be as big as a log truck load of logs and much longer in length.
Since we have the outdoor space available, we like to let the deck of trees stay piled up in a deck until the next year, to begin and if possible, to complete the drying/curing process.
We have cut both dry and green wood for our firewood project and have found that it is much easier to track the progress of wood that is already dry and cured rather than the extra step of recording dates along with moisture content. On those rare occasions during the winter time when the drying process is not proceeding quickly enough, we have had to move the split wood into the heated garage and set up fans and de-humidifiers to dry out excess moisture but we prefer not to have to go to all that work.

The tools for cutting the wood are simple. A good chain saw with sharp chain and a way to mark where to cut each length of wood to assure each piece is 16 inches. We prefer to use good old chalk to mark the wood rather than using commercial pencils that have a oil or wax base with coloring because of the marks it leaves on the wood. Chalk dissipates easily and doesn’t leave a residue. A retractable tape measure with 16 inch increments highlighted in bold red so I can see it easily is handy because the metal tab at the tip sits securely on the end of the log and eight feet of log can be marked quickly and efficiently by one person.
I prefer to mark enough logs at one time to keep the saw busy for a full tank full of gas (about a half hour). This saves on time and cranking energy during the saw starting process. I find that I can cut nearly a quarter of a cord a wood at a time by using this technique. I also try to remove any knots or partial knots that were left on the logs during the cutting (any that I miss can be removed during the splitting procedure).

After the wood is cut into the 16 inch lengths it needs to be split into sizes acceptable for bundles. This is where the Super Split that we purchased from OWC comes in handy. 4 inches and smaller is the guide on this and I like to have a couple of pieces of this size mixed in with smaller sizes to make the wood stackable into square bundles.
Once the wood is split, we stack it into cribs to keep it clean, moveable and easy to grab from while processing into bundles.

Our barn space is limited to small areas in three different barns so the moveable cribs make it easy to tractor a crib from the splitting barn to the drying barn then out to the bundling barn for each of the processes. We use a moisture meter to check the dryness of the wood pieces by sticking the probes into the wood on the end to get a sense how the wood is doing. To get an accurate reading, the wood will be split and the moisture content in the center of the wood is checked. A moisture meter can be purchased at most hardware/tool/logging shops, the one I use is Pittsburgh brand and is a small, easy use tool to assure quality cured wood.
The homemade cribs are a creation that Mike came up with using a standard wood pallet for a base so the forks of the front loader fit nicely. Each crib holds a half cord of split firewood capable of making about 70 bundles of finished firewood. We started off our firewood project with eight cribs and assumed that we would continue to fill them back up with split wood as we worked the wood into bundles.
Stay tuned for the next installment in the Series, So You Think You Can Wood